Line Bot 之利用 Line Notify 突破限制吧!
本文主要是實作如何從基本的 Line Bot 串接 Line Notify,回傳出 URL 讓使用者去綁定達到可以去互動的效果!
前情提要:
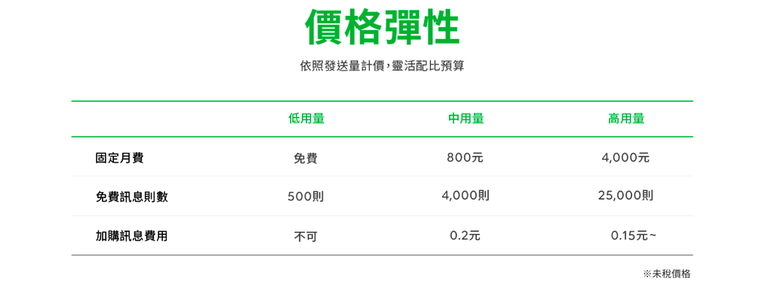
繼之前 讓我們用Python開發一個LineBot 這篇文,我們已經有了一個基本的 Line Bot,但是 Line 有對 Line Bot 有給免費仔們做一些限制(Ex:每個月主動發送訊息(push_message)只能發送500則訊息,回傳訊息(reply_message)不受限制),那我們要如何突破他的上限呢?
那就是利用有官方認證的 Line Notify 去幫我們發送訊息,因為是官方認證的帳號所以可以無限發送訊息重點是還免費啊!

正題:
建立個人 Line Notify:
我們要先去 Line Notify 去申請一個我們的 Line Notify !
登入之後 => 右上點你的 Account => 管理登入服務 => 下面的登入服務 => 創建你的 Line Notify
裡面有一個要注意的是 Callback URL 這個,這邊要填入你的 webhook 這樣之後他才能跟我們的程式去做互動。
Ex: https://你的Heroku APP名字.herokuapp.com/callback/notify

讓 Line Bot 發送訊息讓使用者 跟 LineNotify 綁定 :
創造綁定的URL:
我們剛剛有了我們創好的 Line Notify,之後我們要叫使用者去綁定我們的 Line Notify 這樣之後才能對使用者發送訊息!
在剛剛你創好的 Line Notify 裡看到 Client ID 與 Client Secret
 接下來就是用程式創造出我們的URL讓使用者去綁定! \
# 創造URL程式碼:
# 這邊的 os.environ 就是把資料從 Heroku 的設定檔那邊找到並拿下來用,不知道整麼用的可以看上一篇
# 這段程式碼主要是會回傳一串 URL 這時候就能跟我們上次的 LineBot 去做結合直接回傳回去給使用者去做綁定!

line_bot_api = LineBotApi(os.environ['CHANNEL_ACCESS_TOKEN'])
handler = WebhookHandler(os.environ['CHANNEL_SECRET'])

import os, urllib
client_id = os.environ['NOTIFY_CLIENT_ID']
client_secret = os.environ['NOTIFY_CLIENT_SECRET']
redirect_uri = f"https://{os.environ['YOUR_HEROKU_APP_NAME']}.herokuapp.com/callback/notify"
def create_auth_link(user_id, client_id=client_id, redirect_uri=redirect_uri):

    data = {
        'response_type': 'code',
        'client_id': client_id,
        'redirect_uri': redirect_uri,
        'scope': 'notify',
        'state': user_id
    }
    query_str = urllib.parse.urlencode(data)

    return f'https://notify-bot.line.me/oauth/authorize?{query_str}'
回傳給 Line Notify 並拿取使用者 Access Token
我們前面有了 URL 之後就能透過 URL 去做綁定並跟 Line 去做溝通要使用者的 Access Token,我們以後只要透過這個 Access Token 就能傳訊息給我們的使用者或群組惹!
# 監聽綁定回傳跟綁定完成會發送你好的訊息程式碼
from flask import request
@app.route("/callback/notify", methods=['GET'])
def callback_notify():
    #assert request.headers['referer'] == 'https://notify-bot.line.me/'
    code = request.args.get('code')
    state = request.args.get('state')
    #print("Code:"+code)
    #print("state:"+state)
    #print(event.source.group_id)

    # Get Access-Token
    access_token = get_token(code, client_id, client_secret, redirect_uri)
    #print("AccessToken="+access_token)
    #print("Clinet_id"+client_id)
    google_sheet(client_id,access_token)
    send_message(access_token,text_message="你好")   #發訊息

    return '恭喜完成 LINE Notify 連動!請關閉此視窗。'

#拿取幫綁訂人的access_token
import json
def get_token(code, client_id=client_id, client_secret=client_secret, redirect_uri=redirect_uri):
    url = 'https://notify-bot.line.me/oauth/token'
    headers = { 'Content-Type': 'application/x-www-form-urlencoded' }
    data = {
        'grant_type': 'authorization_code',
        'code': code,
        'redirect_uri': redirect_uri,
        'client_id': client_id,
        'client_secret': client_secret
    }
    data = urllib.parse.urlencode(data).encode()
    req = urllib.request.Request(url, data=data, headers=headers)
    page = urllib.request.urlopen(req).read()
    res = json.loads(page.decode('utf-8'))
    #print(data)
    return res['access_token']

#利用notify發出訊息
def send_message(access_token, text_message):
    url = 'https://notify-api.line.me/api/notify'
    headers = {"Authorization": "Bearer "+ access_token}
    data = {'message': text_message}
    data = urllib.parse.urlencode(data).encode()
    req = urllib.request.Request(url, data=data, headers=headers)
    page = urllib.request.urlopen(req).read()
這樣基本就完成了 LineBot 讓使用者綁定 Line Notify 了,之後就用下面的函式(send_message)就能把你想要發送的訊息給你指定的群組或使用者了!
我知道我講的有點簡略,但可以搭配下面前輩的文章一起參考喔!
如果都不行或是還有疑問就留言吧!如果我會,我就盡量回答!!